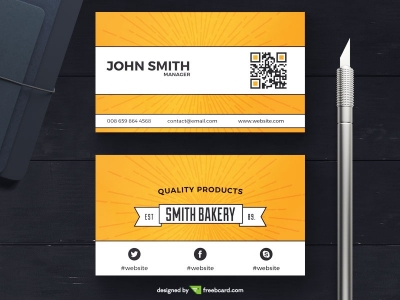
Customize your own business cards with our free templates and the help of our guide. Here you can find out how to make our templates your own in photoshop.
While designing our business card templates we had customization in our mind, how can we make personalization easier for our customers. We placed our layers so modifying is easy and intuitive. The first step is to download the template you like the most.
01. Change the name
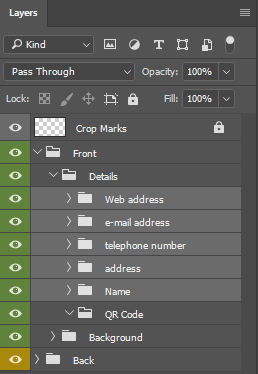
After you downloaded one of our free templates, there are various ways to customize it. The first thing you might want to do is changing the place holder name to your own. Your personal details are displayed on the front side. To change these first you have go to the layers panel, there open front>Detail>Name. That's where the name and profession is. Double click on the "T" and now you can type in your name, or the name you want.

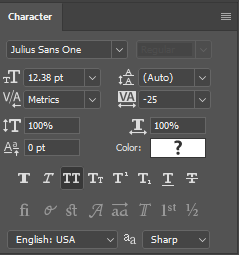
After you did that you can personalize the font even further by changing the size of the font, spacing between letters, the font itself, the color, and many other things which are accessible in the character panel.
02. Change contact details.
If this is not present go to Window>Character. To enter your personal contact details, you have to open the corresponding folders inside the layers panel: Front>Details. The contact information is contained in separated folders, each containing every element (icons and text). This way you can easily remove any detail you don't want to share.
03. Change the company name
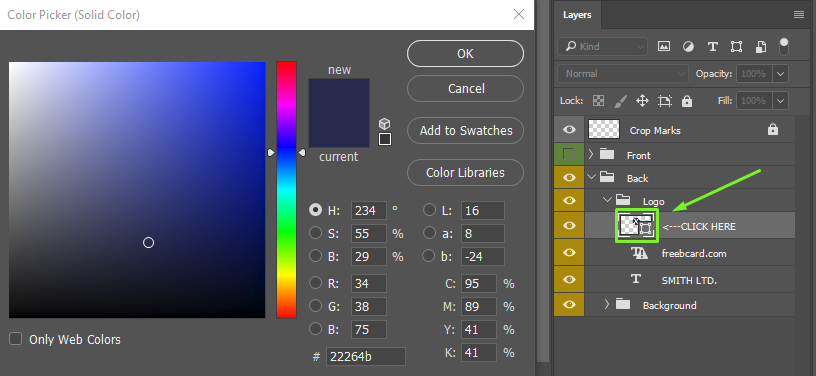
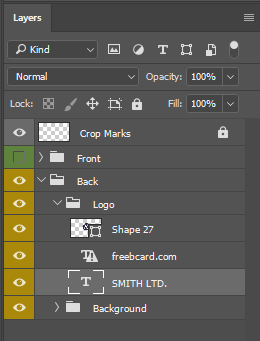
On the back side of the visiting card. usually you can find the name of the company you can change this the same way, by expanding the folders in the layers panel and open the corresponding one. while working on the back side, hide the front layer by selecting the eye icon. On this side you can usually find the company logo, depending on the business card template you chose The logos, as well as the details of this side should be contained in the logo folder. You can remove the placeholder logo we used and place the one, which belongs to you here. To do this select our logo shape and press delete. It is important that you drag your logo to the same folder in order to avoid any overlapping. You should also consider the style of the business card template you chose. Match the style of your logo with it. For example if you have a flat design add the flat version of your logo. You can change the color of the item (logo) you just dragged in by double clicking on the rectangle next to the shapes name.
04. Insert company logo and change elements
You can change the size of the logo by selecting it first, then pressing Ctrl+T. You should from the corners, and not the sides, and hold down shift while doing so. This is necessary in order to avoid distorting the logo, this way it will scale proportionally. Now put it where you wish it withing the card and when done press enter. By pressing enter you accept the transformation changes you just made. Be aware when you make changes, not to drag any information in the safe zone, or in the bleed zone. If you want to know why click here, You can customize it further by recoloring the shapes which make up the background. We strive to keep these shapes separated as much as possible, so it contains many layers and can be taken apart and recolored piece by piece. To recolor shapes select one from the layers, or click on one in the artboard itself (if you chose to select this way be aware that there may be other shapes in front which you cant see and select the wrong shape by accident). If you selected your shape from the artboard it will be highlighted in the layers. Now double click on the rectangle near the name of the shape and select the colors which which you like, just like you did when selecting the color of the logo. When you are satisfied with it save it.